Showing posts with label zoya. Show all posts

Saturday, January 4, 2014

Rainbow Penguins

A while back my friend sent me a link to a video and just two words, "Do this!" I'm a huge penguin addict so it wasn't hard to convince me. The video was by professionalDQ and is a tutorial for rainbow penguin nails inspired by toesocks. Please go check out her video HERE because she is just so talented! I'm still getting used to working with acrylic paints but I am so happy with how this turned out. Next on my to-do list is to find those toe socks!!

For the rainbow I cleaned off a striper polish brush and created stripes using all Zoya polishes. I used Zoya Jolene, Sooki, Darcy, Josie, Breezi, and Mira. After creating the rainbow I used a layer of China Glaze Fairy Dust on all the nails. Everything else was created using acrylic paints with paint brushes and dotting tools. The only thing I changed was I added little dots to the bow for the girls. I am very proud of myself for this recreation because it really pushed me and now I can't wait to try out more.


Friday, January 3, 2014

Zoya Dahlia

Dahlia is a polish that I got when it came out and it has sit on my shelf since then and I have absolutely no idea why!! Out of the first collection I think it was my most anticipated polish and yet it was an untried until now. I still can't get over the fact that Zoya actually was dark enough to name it (Black) Dahlia. Huge points for that level of twisted Zoya!

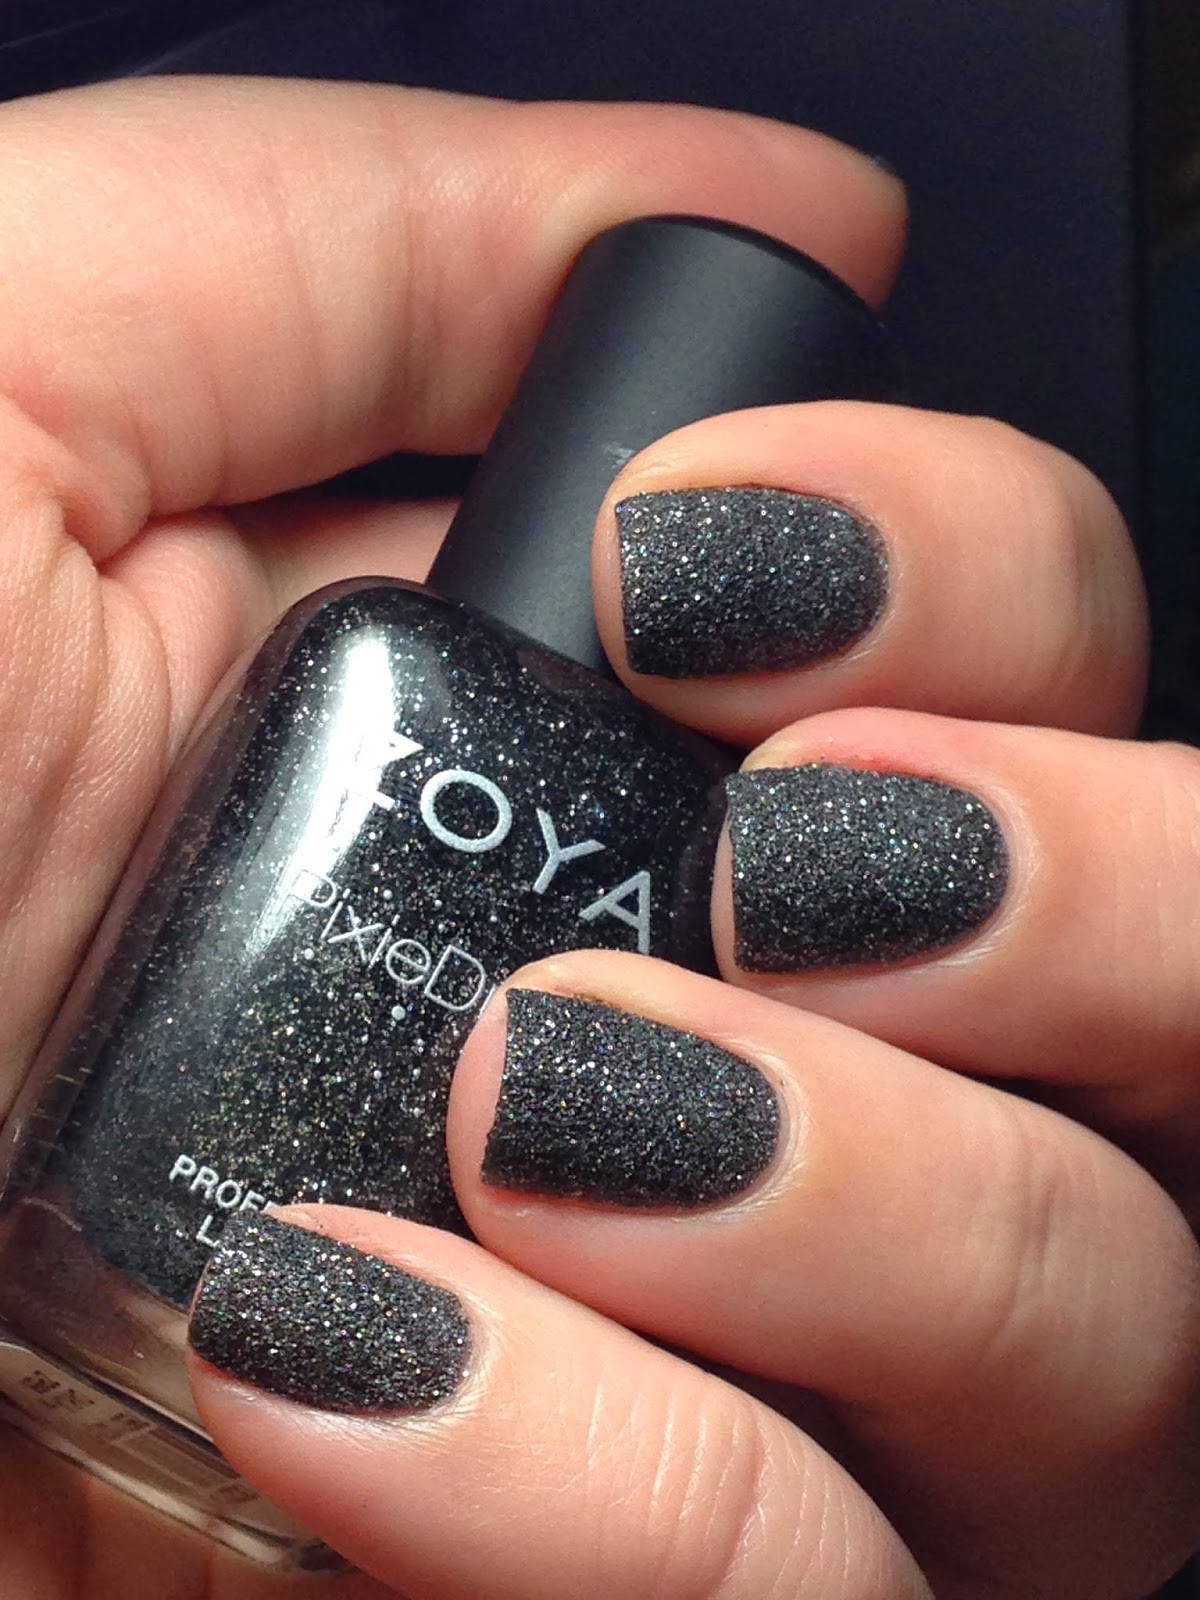
Zoya Dahlia is a black pixie dust polish with lots of silver glitter and sparkle to it. It reminds me of a highway with asphalt glittering in the summer heat. Yes, that is a compliment. It's absolutely stunning! It's dark but the sparkle makes the black totally wearable and appropriate. It almost leans more towards a charcoal black/grey with all that sparkle. It only took two coats of Dahlia to reach complete opaqueness and like all pixies I have tried so far the formula was an absolute dream. I still haven't been adventurous enough yet to try putting top coat over it but maybe someday. I just enjoy the texture so much as is and feel that top coat defeats the purpose but still some day I will try it.


Monday, December 30, 2013

Monday Nail Art for Nubs - Cherry Blossoms

Happy Monday everyone!! A few days ago the Bath & Body Works semi-annual sale started and I may have gone a little bit overboard. Twice a year I allow myself to go crazy in there because the deals are just way too good to pass up. Plus, add in a few coupons and it makes it even easier to justify the insanity that is the first day of the sale. For today's mani I decided to go with a design based on my moms favorite scents, Japanese Cherry Blossom.

First I started off with one coat of Milani White on the Spot on all nails followed by one coat of Briar Rose by Hit Polish. I jelly sandwiched the glitter using OPI Funny Bunny. Next I sponged on Zoya Shelby a pink polish into random spots on the nails. To finish it off I stamped cherry blossom branches and flowers onto each nail using Vivid Lacquer VL022 and Sinful Colors Coffee. I had a lot of trouble with this stamp and think maybe it was just a bad plate. I had to stamp the nails several times to get it to appear as it does in the final pictures which I am still really happy with it was just hard to get there. I finished it all off with a coat of Seche Vite.


Monday, December 23, 2013

Monday Nail Art for Nubs - The Vivid Lacquer Love Continues

This weekend I just could help myself and did a whole other manicure using the amazing Vivid Lacquer plate VL023 that one of my best friends Linda got me for Christmas. It's so odd that it's Christmas and all I want are mermaid and pirate nails. But...I'm sorry that I'm just not sorry. I do think I will have to switch off and do some obligatory Christmas nails but this mani might just be going right back on after Christmas.

As soon as I saw this plate in the vivid lacquer store the idea popped into my head of exactly what I wanted to do. Somehow I actually was able to get it out on the nail exactly how I envisioned it in my head and that just never happens. Pre-Christmas miracle I guess!!

For this mani I started off with two coats of Zoya Farah on each of my nails. P.S Farah is amazing and quickly becoming one of my favorite Zoyas! I wanted to create the look of an old distressed map so I used Pueen 45 and Zoya Flynn to stamp on a almost splatter type design. Everything else was done using Vivid Lacquer plate VL023. Next on each of the nails except the ring finger I used Sinful Colors Coffee and stamped the map design with script. Using Cult Nails Fetish I added a different design to each of the nails with the plate.

There were just so many great images to choose from but I went with the large ship on my thumb, the small pirate flag on my index (yes, there is a much larger pirate flag on the plate too!), for my middle finger the small ship and a mermaid, and on the pinky a small skull and cross bones. For my accent nail I used Sinful Colors Coffee to stamp the image of the compass. I tried to stamp it at an angle and to the side to leave room for a pirate that I stamped using Fetish. The pirate totally looks like the Captain Morgan pirate...love it!!  The plate is just perfect. Everything stamped great on the first try and just so many great images to choose from on one plate with lots of variations and sizes it's just so versatile for all nail types. I seriously can't show enough love for this plate.

To finish everything off I used one coat of Seche Vite. I think this may actually be my favorite design I have every done! Of course though I had to end up adding matte top coat to it but it just added to the effect!! If you haven't definitely check out the Vivid Lacquer store! Also, make sure to check out the other manis that are part of the Nail Art for Nubs linkup below!


Sunday, December 22, 2013

Vivid Lacquer Plate VL023

This weekend I got an early Christmas present from one of my best friends and just had to use it immediately. She got me two of the new Vivid Lacquer plates that I had really wanted which was so freaking sweet of her. So this post will be a small review of one of those plates and I will also have more from this plate tomorrow.


Vivid Lacquer plate VL023 is a pirate and mermaid themed plate with images of pirate ships, waves, a compass, pirate flags, and of course several different pirates and mermaids. As soon as I saw this plate released I was in love and fell even more in love with it in person. I think lately I have had a little bit of a pirate obsession. This may be because I have a slight crush on Captain Hook. No, not the cartoon or creepy version from Hook, but the hottie from Once Upon a Time. Tomorrow will be pirate nails but today I have Mermaids!

Let me just say first that the quality of these plates are amazing! These aren't my first Vivid Lacquer plates and are just as amazing and perfect as the other ones I have. The etching is perfect on these images and I didn't find any to be too deep or shallow. I was able to get a perfect stamp the first time on all of the images I tested.

I started off with a base of Milani White On The Spot on all the nails and then let that dry. Next I did a gradient starting at the tips and went about halfway up the nails using Essie In The Cab-ana. Then using VL023 I stamped on the wave pattern also using In The Cab-ana. I decided I wanted a little bit more contrast so I decided to use the double stamping technique and stamped with the waves again on each nail this time using Zoya Cynthia. I loved the contrast so much and almost left it at that but I had set out with intent to use mermaids and couldn't just leave it. There are four different mermaids on VL023 and I used one of each on my nails. I finished it all of with a coat of Seche Vite and then one coat of Butter London Matte topcoat.


Vivid Lacquer plates can be purchased for $8 a plate from their Etsy store here: Vivid Lacquer.

Saturday, December 21, 2013

NOTD Simple Stamping with Zoya Dream

The first thing I want to say is a huge I'm sorry!! The last two weeks have been so crazy with work and Christmas prep. Since I put on Dream Monday and still have it on today so you can definitely tell it's a busy week because that almost never happens. I did add some simple black stripes because I thought the contrast between the dark black and the sparkling blue would look great. It has kept me mesmerized all week long!! It's so simple but this combo made me so happy and I received more compliments on this than many elaborate manis I have done. For the stripes I used cheeky plate 10 and stamped with Cult Nails Fetish. I finished it all off with one coat of seche vite.


Tuesday, December 17, 2013

Zoya Dream

During Black Friday this year I really didn't do much shopping. I never go out shopping that day because it just isn't worth the insanity for me. Online shopping though is a completely different story. I was really good this year and only took advantage of one deal and was able to justify it by calling it my Christmas present to myself. That order was with Zoya and it got me the huge dream box filled with 12 polishes. One of the main reasons I wanted that box was for Dream. I have almost purchased Dream so many times and now I finally have it in my hands!! Sure I already have two dupes of it but I am so drawn to colors like this I will purchase all the dupes for all of time.

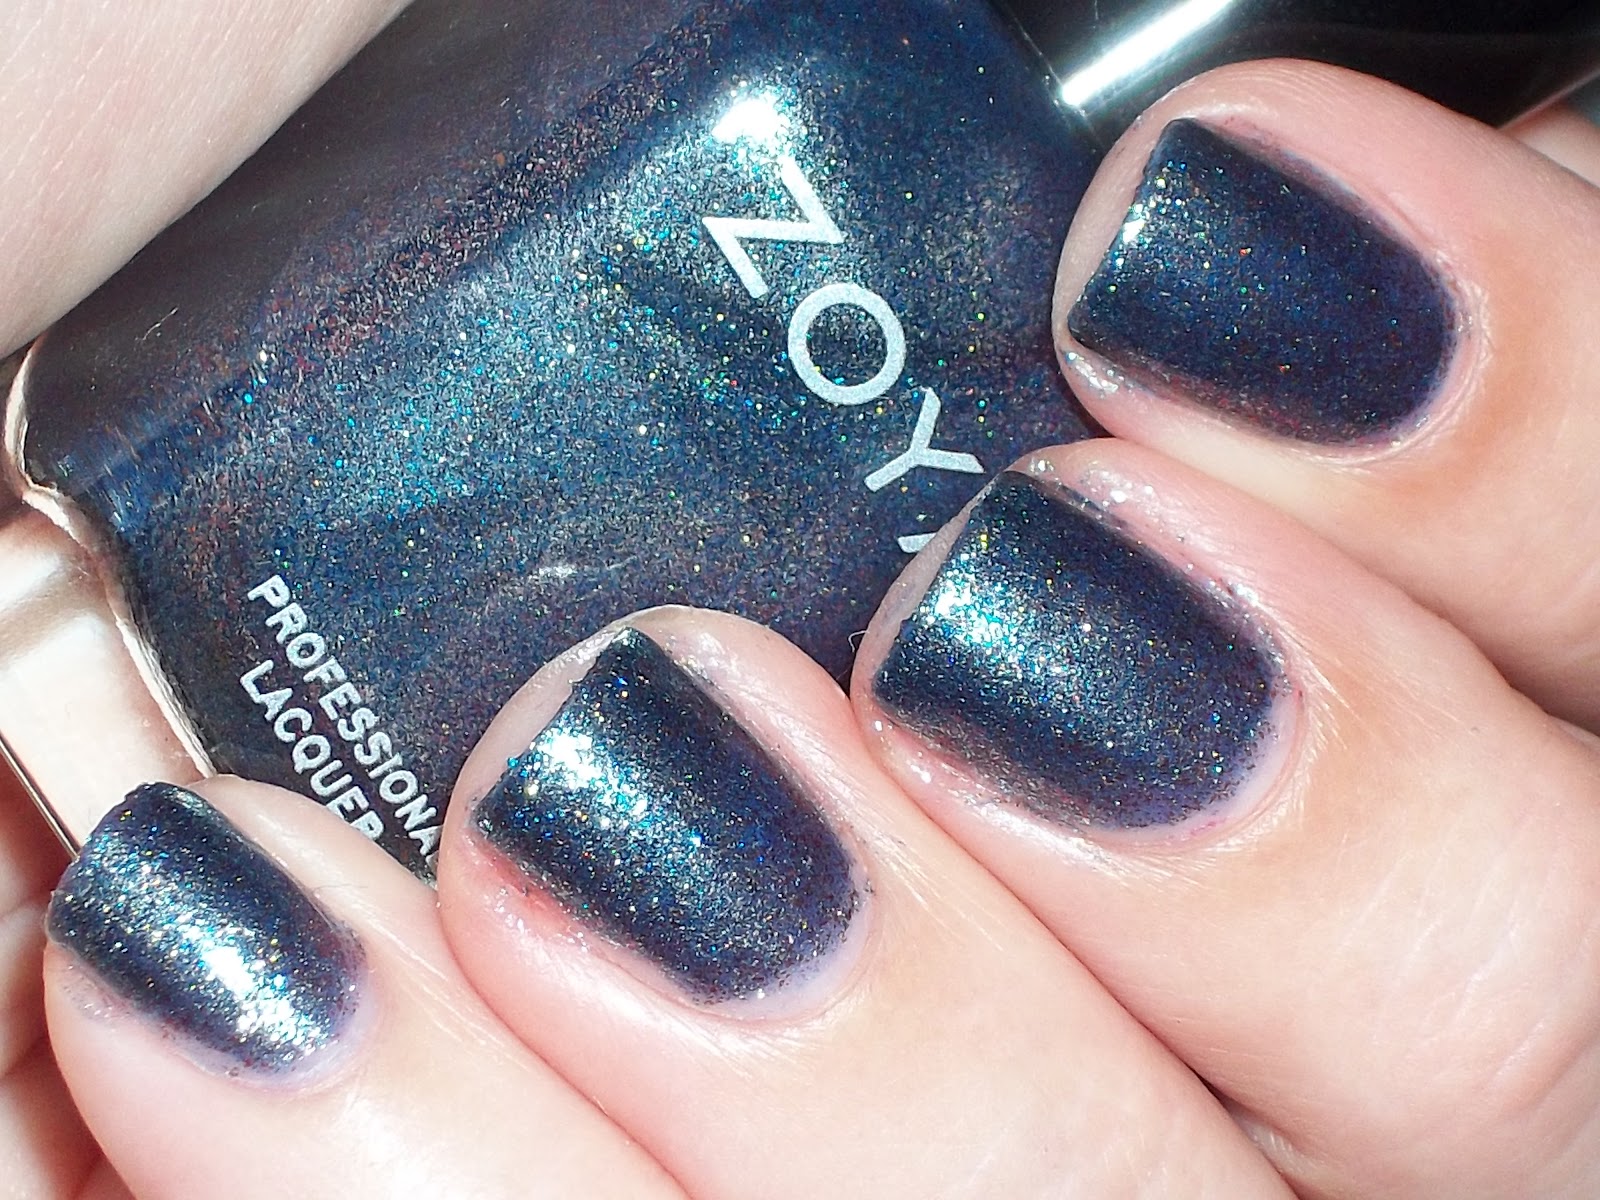
Zoya Dream is a dark blue jellyish type formula full of holographic flakes. It only took two coats to reach full opaqueness and I didn't have any real issues with application. There was a tiny bit of balding towards the top of the nail on the first coat but it was easily covered by the next coat.I did two coats and finished with one coat of Seche Vite.Clean up around the cuticle was easy so I am hoping for minimal staining if any. It's a blue though so who am I kidding, it's going to stain! Don't care!! Dream is worth permanent smurf nails. Time for the pics!! All pics were taken outside in the sunshine but this polish sparkles and shines in all lighting.


Monday, December 9, 2013

Nail Art For Nubs Monday

Am I the only one who has days where no matter how many times you paint your nails it just doesn't turn out right like you have completely forgotten how to paint your nails?? This is how my entire weekend was. I kept trying and failing various manis so late last night I settled for one coat of Zoya Chita which is my new go to polish for crunch time. It's perfect in one coat and easy to work with so no clean up is needed. Then today I decided to tempt fate and add some stamping. It didn't turn out quite how I wanted but I am still happy with it and it feels so festive. I used Maybelline Bold Gold to stamp and Gals plate GA27 and Bundle Monster plate BMH03. Make sure to check out the other lovely manis that participate in the gallery below!!


Sunday, December 1, 2013

Turkey Day!

I hope everyone had a great Thanksgiving if that is what you celebrate or if not I hope your Thursday was wonderful! Also, happy first day of Hanukkah to those who celebrate! One of my friends shared a pin from Pinterest with me and told me I HAD to try it for Thanksgiving and since I love everything minion I very quickly agreed. Here is a link to the pin that inspired me to try the same thing. I was really happy with how it turned out and got so many compliments from my family. The only polishes I used were Zoya Arizona and China Glaze White on White. Everything else was done with acrylic paints.


Thursday, November 14, 2013

Zoya Sailor + SOPI Traffic Stopper Copper

So lately I have been really loving the combination of glitter and matte top coat. For this mani I decided to keep it really simple. I started with two layers of Zoya Sailor as my base. Then I added one layer of Sephore by OPO Traffic Stopper Copper. There is just something about the combo of blue and copper that is just made for each other...I love it! Then of course I had to make it matte so I used my Butter London matte top coat. I am so happy with the results and as you will see soon it inspired another similar creation.


Wednesday, November 6, 2013

Zoya Sailor

Zoya Sailor is a dusty navy blue cream that basically applies itself. It was almost a one coater and some people will probably be able to make it a one coater but I am a two coat polisher by habit. The consistency was great and I had no trouble at all with pooling of the cuticles. This polish is going to be so great for fall/winter. I have already used it three times and I just got it a few weeks ago. I will be posting tomorrow a great glitter combo I found to go with this.


Monday, September 30, 2013

Breaking Bad

Just wanted to quickly share my mani from last night for the finale of Breaking Bad. Polishes used were: Cult Nails Riot, Mayhem, Tempest & Fetish, Zoya Yummy & Farah,Sinful Colors Envy, Maybelline Bold Gold, Rainbow Honey Heisenberg, and China Glaze Running in Circles. Decals are from my friend Samantha of Justonemorebottle. Stamping was done using various plates including Pueen and BundleMonster.


Friday, August 9, 2013

NOTD Stamping with Zoya Sunshine

So another obsession I have had lately besides texture polishes is stamping over texture polishes. For this look I started with a base of Zoya Sunshine and decided to go for a romantic scene so I used Sinful Shine Wisp to stamp cherry blossom branches and a cute little couple under a tree onto my nails. The branches and flower are from a Born Pretty Store plate and the accent finger of the tree and little boy and girl kissing is from Winstonia. The pink blossoms of the flower are Zoya Jolene.


Thursday, August 8, 2013

Zoya - Sunshine

I have a slight obsession with texture polish but that isn't anything new so when the new fall Zoya pixies were released I kinda had to have them all right that second. The one I knew I had to try first as soon as I ripped open the package? Sunshine! My two favorite colors are sunshine yellow and blue anything for nails so a gorgeous blue Pixie Dust with the name Sunshine? Yeah, that one was made for me! Sunshine definitely didn't disappoint either. It was completely opaque in just two coats and had a quick dry time. Like all pixies it wore like iron and had the same great sparkle you come to expect with pixie dusts.


Thursday, December 27, 2012

Zoya Sharon

Zoya Sharon is the base for my my first gradient I did a few days back and just an absolutely gorgeous color. I really wanted a bright happy color to cheer me up with all these dreary days it it worked perfectly. It is so tropical and warm looking it reminds me of being in Florida. Sharon is a medium yellow toned orange that is bright enough that it doesn't come across pumpkiny at all. Application was pretty good but it did need three coats to be opaque. Formula wise this was also really good not to runny or goopy so I would definitely use this one again.


Saturday, December 15, 2012

Zoya Reagan and Lara Stamping

Lately I have been really obsessed with pictures of stamping that show two colors together that are so close to each other but contrast perfectly for an effect that is just stunning. I never had a clue how they came up with the combinations and hadn't yet tried it but then a combination finally hit me. I was organizing my polishes today and came across the Zoya Beach collection that was actually still in the plastic box it came in. Lara and Reagan were sitting right next to each other and I thought they would make the perfect first attempt at the effect I was wanting. I absolutely love how the combination turned out and can't wait to try out more color combinations now that I think I've got it.

For this I used two coats of Zoya Lara and then added a coat of Cult Nails Wicked Fast. I then stamped using Zoya Reagan and Cheeky plate CH6. Reagan was so easy to use for stamping and came out great on the first try.  I finished it all off with a coat of Seche Vite and am just amazed. I really really love this combination!


Tuesday, October 16, 2012

Zoya Julieanne

Zoya Julieanne is a beautiful royal purple with purple flakes that also shine to gold if it just the right way in the light. Formula on this was great and was not too thick or thin. It was fully opaque after just two coats and dries to a glossy shine. It is really an amazing color and so easy to work with. If you are looking for a great purple with a little something extra then I definitely recommend checking this one out!


Thursday, October 4, 2012

Halloween Serial Killer Nail Tutorial

Halloween is my absolute favorite holiday of the entire year. Fall is finally here, the weather is not trying to melt my flesh, and there is a new scary movie out in the theater every single week! Plus costumes and candy! This nail tutorial is inspired by Halloween, my favorite serial killer that is finally back for a new season Dexter, and this awesome nail design by my friend Samantha that can be found here.

First you are going to paint your nails with two coats of a white polish. I chose to use Essie Blanc. Then you are going to to want to top coat this so that when you add red they don't bleed together to turn into an awful strawberry milk color. Don't really worry too much about cleanup because it is about to get really messy!


Next you are going to add blood spatter! There are lots of different methods and tutorials but this is just how I do it. Take your bottle of polish, for this I used Zoya Rekha, remove the cap and put it to the side. Now you are going to take a drinking straw and dip it right into the bottle of polish. You do not need to stick the straw all the way to the bottom just stick it in far enough for the tip of the straw to become covered. Quickly aim the straw at your finger and blow through the straw with one big breath. As as much or as little "blood spatter" as you like. This can get very messy so clean up your skin and around your cuticles as you let the spatter dry before you add top coat for the next step.


Now you could stop here or continue on to the next step to take the creepy up to another level. I thought it would be cool to have a little note on my nails in the classic serial killer type ransom letter style with cut out letters from a magazine. For this you will need to work one nail at a time. Add a layer of top coat to your nail and then add your letter clipping to your nail and position it. If it keeps peeling up push it down and hold it in place for a few seconds. Also as the top coat dries it will be easier to push it into the topcoat and make it stick. Once you have it successfully pushed down add another layer of topcoat to seal it all in. You should end up with something creepy like this!


Thursday, September 13, 2012

Zoya FeiFei

Today I have for you Zoya FeiFei which is one of the polishes I picked up in the Zoya BOGO sale. It just looked so sparkly that I knew I had to have it and it did not disappoint at all! FeiFei is a light silvery blue packed with glitter flecks in silver, blue, gold and possibly more. It absolutely lights up and twinkles on your nails. Formula was great. It was a little on the thin side but easy to work with and built up really nicely. It was opaque in three coats and I topped it with a layer of Seche Vite.

All but the first picture were taken on day three using the Elmers glue basecoat method for easy glitter removal. I don't know if it was the glue or the polish but you can't even tell that there is tip wear really and zero chips!

Indoors Day 1

Day 3 in sunlight

Day 3 In sunlight

You can really see the glitter shift in colors here

Yes it's blurred out but look at all that shimmer and glitter!