Thursday, March 27, 2014

Watercolor Sugar Skulls

So I have been seeing manis everywhere of people making stamping decals with jelly type polishes or the new OPI Sheer Tints that just look amazing. They look like watercolor paintings on your nails. I was about two seconds from buying the Sheer Tints when someone said they would just make their own if they wanted them. This seriously intrigued me and I had to try making my own too.

 I started off with just my thumb because I had no confidence that I could get it to work. I have just barely got the hang of stamping decals so I felt like this was a little beyond my reach. To my shock it worked like a charm and I had created I think my favorite nail of all time!

The technique I used to create the sheer tints was to put down a large drop of top coat onto a nail plate and then mix it with a tiny dot of any polish color you want. Then you just have to mix it up and paint it inside your image. I just used an OPI topcoat I had sitting around that wasn't being loved and that I got for free. Yeah, I will end up using all of it now!! You could use any topcoat though. To mix and apply the polish to the image on the stamper I just used a dotting tool.

So with the sweet taste of success I went on to the other nails and created what I think just may be my favorite mani of all time!! If not my favorite easily top three. I used the same sugar skull on all my nails that came from Cheeky jumbo plate Viva Mexico.


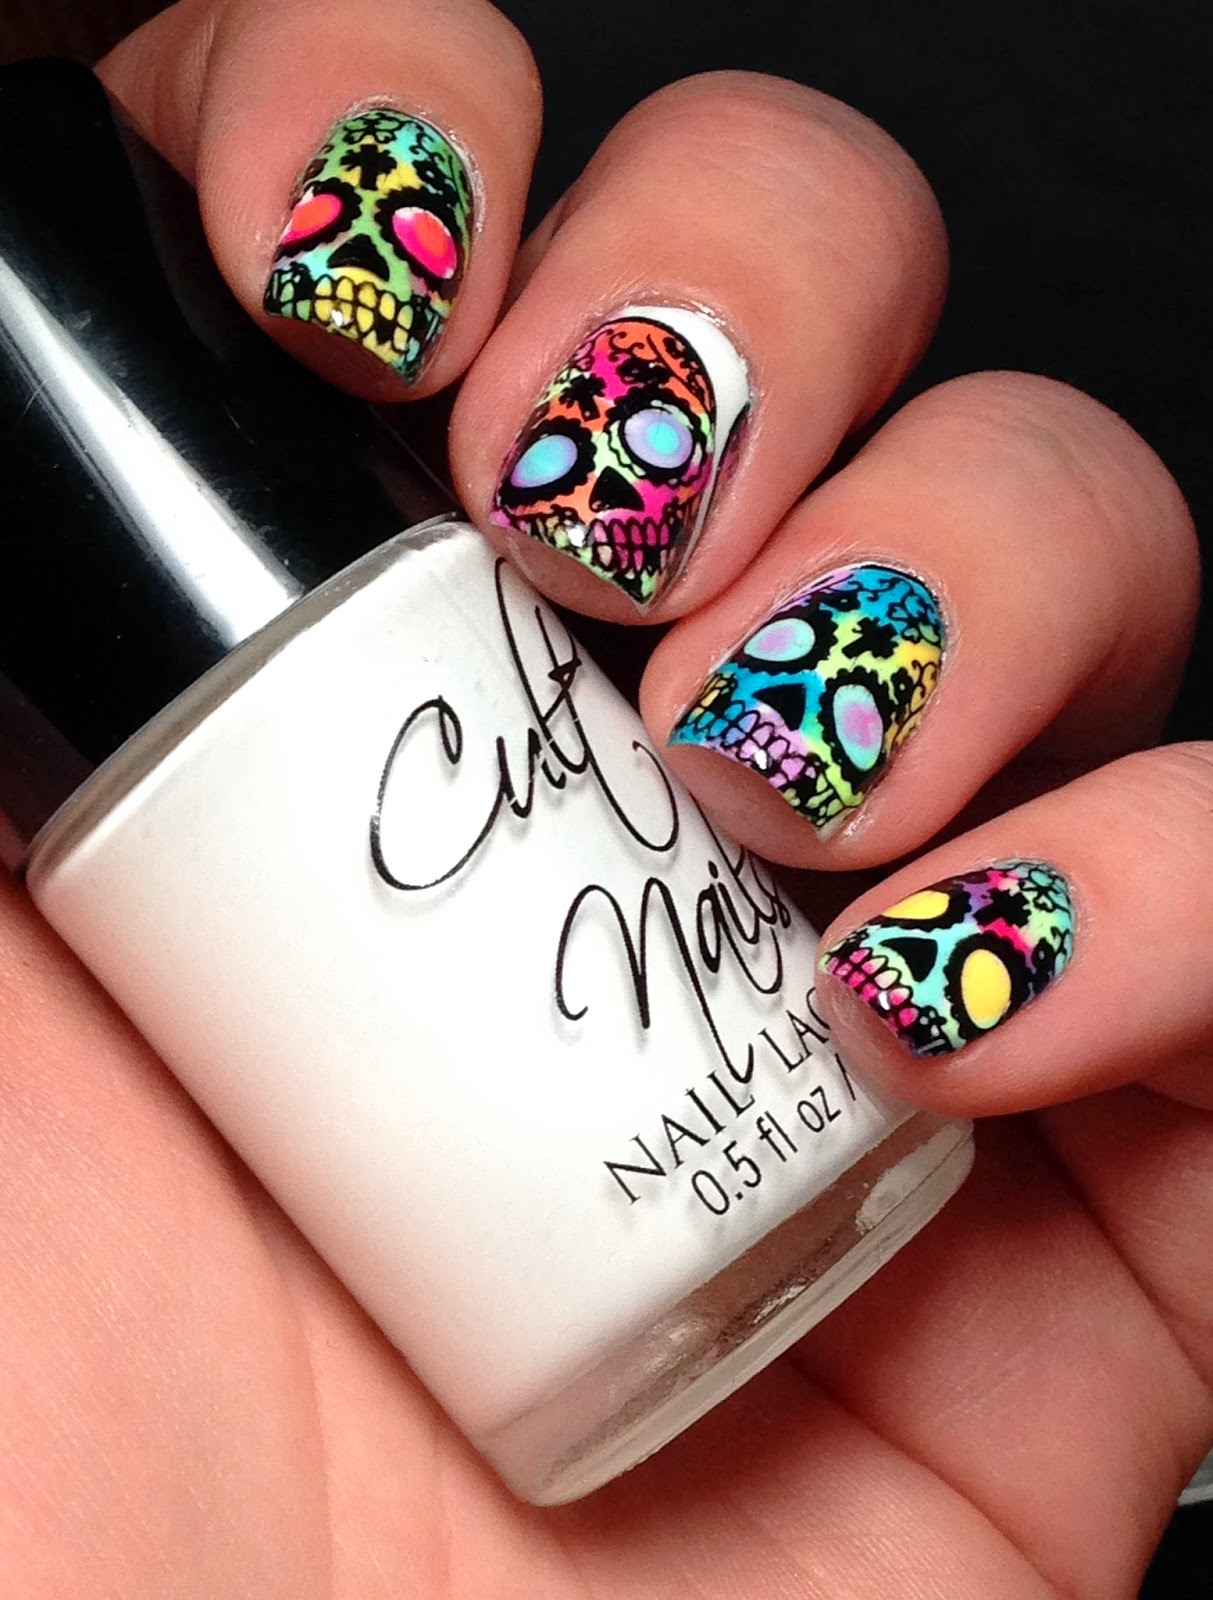
This mani was a great way to test out a bunch of polish I haven't tried yet and the list is super long so bare with me!! There are a few in here that I have used like Cult Nails Tempest as my base but the majority were untried. Polishes used are: Pop Beauty Mint Magic, China Glaze What a Pansy, Grass is Lime Greener, Metro Pollen-tin, Zoya Yummy, Pippa, and Darcy, OPI Hey Baby, Color Club London Calling and Pardon My French, Cult Nails Party Time and Sinful Shine Mardis Gras and 24/7. I think that is all but my desk is literally covered in polish so sorry if I missed one!


Monday, March 24, 2014

Nail Art For Nubs: Blue Daisies

It's spring!! It's Spring! It's finally Spring!!! With a 50% chance of snow tonight and freezing temperatures. *womp* *womp* *womp* I did get to wear flip flops one day this week though so it's getting there just super slowly. This week I decided I wanted to put one of my favorite flowers that reminds me of spring on my nails. Daisies!!! More specifically I really really love blue daisies. Not sure if that is a real color they come in but I see them everywhere so that's what I'm going with. I also decided to push my comfort zone a little and actually paint the daisies and not stamp. I am so happy with the way they came out!!! I used two coats of OPI 4 In the Morning and then painted on the daisies using acrylic paints. Of course I had to try it out both shiny and matte. This one I definitely love matte more but both ways just make me so happy and even more excited for the rest of spring to finally show up.


Sunday, March 16, 2014

Vivid Lacquer VL022

Today I thought I would do a little review on Vivid Lacquer plate VL022. Plate 22 is an Asian themed plate with Japanese cherry blossoms, ninja throwing stars, daggers, and nun-chucks, and dragons. One of my favorite things about Vivid Lacquer plates are all of the great variations of designs and sizes. The throwing stars come in multiple sizes and designs and the dragons also come in three different sizes from a small one to one that can span the size of several nails. There are also a couple of full size nail designs such as the dragon scale design.

For the mani I did using this plate I started with two coats of Smitten Polish Mintmallow. Next using Sinful Shine My Kyrptonite I stamped the dragon scales on all of my nails. I decided to use the largest dragon stamp and placed it across three nails from my index to ring finger using Mash black stamping polish. On my pinky I stamped a few throwing stars in black. Next I worked on my thumb and placed the smallest dragon in the middle. I decided to add cherry blossoms to the top and bottom as accents. I wanted to integrate more cherry blossoms into the design to tie it all together so I added some to my middle and index fingers. I topped everything with a coat of Seche Vite. Like always I had to add some matte top coat too. I really love it both ways!!!

VL022 is another amazing plate from Vivid Lacquer! This plate was super easy to use and I had zero issues picking up the image. Vivid Lacquer plates can be purchased from her Etsy store HERE.


Wednesday, March 12, 2014

Neon Dinos Inspired by NailStamp4Fun

Last week I saw this amazing manicure and tutorial by @NailStamp4Fun on IG that I fell in love with and knew immediately I had to do my best to recreate it. Retro neon dinosaurs?? Yes, please!The tutorial can be found HERE and you really need to check it out because it's just amazing! All of her work is just gorgeous!

I didn't have any of the the colors that she used so I had to improvise. The colors that I used are Color Club Pucci-licious (purple), Sinful Colors 24/7 (pink), Zoya Robyn (blue) and Zoya Mitzi (green). I painted two coats of each on the nails and then stamped the spiraled image with Winstonia 216 and Cult Nails Tempest. I top coated with Seche Vite and pulled out all my stampers and worked on the decals using Winstonia 220 while waiting for it to dry. Her tutorial is really great so I definitely recommend following closely to it. My main tip is going to be patience. Be patient for the decal to dry and to wait til the top coat is just barely tacky to the touch. If it's too wet your whole nail will smudge off. Trust me! I decided I wanted to make this design matte so I added a layer of Butter London matte top coat to finish it all off after that final coat of Seche Vite.

I am so ridiculously excited for how this turned out!!!!


Monday, March 10, 2014

Nail Art for Nubs Monday

Last night before I went to bed I decided to put on Zoya Stevie because I am so ready for spring and that is a perfect pixie for spring. All day I was thinking about what I wanted to stamp and for some reason octopus jumped to my mind. The octopus stamp from the Bundle Monster CYO set is probably one of my favorite images and I thought trying it over a pixie would be something different. I started off with three coats of Zoya Stevie and then used Bundle Monster plate 401 with MASH black stamping polish to create the octopus on my accent nails and then the tentacles on the rest of the nails.


Wednesday, March 5, 2014

When Pigs Fly!!

Today someone said to me the phrase "when pigs fly" and that had me thinking all day of how I wanted to put that on my nails somehow. I knew Winstonia's new set had a cute little piggy with wings that would be absolutely perfect. I started with a base of Cult Nails Nakizzle's Shizzle and stamped little clouds using Cult Nails Tempest and Mash plate 37. Next I made stamping decals using Winstonia plate 217. This is only my second time trying out the decal method but I am so happy with how it turned out this time compared to last. I am excited to try out decals again now. It's so rare for a design to turn out how you envisioned it exactly but this one did. This mani just makes me super happy and I hope it at least puts a little smile on your face too!


Monday, March 3, 2014

Nail Art for Nubs: Oscar Nails

I hadn't planned on doing nails for the Academy Awards but it just kinda fell into place that way. I was so excited for the Oscars this year though so I am really happy this worked out! I started off with three thin coats of OPI Love. Angel. Music. Baby which may be my new favorite gold polish. I will have swatches of that alone soon. Staring at it though and then looking through plates and stumbling upon my Vivid Lacquer plates, the idea really just hit me. I used Vivid Lacquer VL021 for all of my nails to create a black and gold hollywood movie themed mani. I stamped with Cult Nails Fetish which is a matte polish so I could keep a matte look without having to use any topcoat.